Tuesday, August 7, 2012

Adrian's Backyard Camp out


Who doesn't love s'mores?!!


When I asked Adrian what he wanted to do for his fourth birthday, I was not prepared for the answer I got. He said to me "Mommy, I want to go camping!". Camping? Where the heck did that answer come from?!. Then I remembered he had recently watched an episode of Doc McStuffins where they went camping. So that was it, that's what he wanted and that's what we were stuck doing. And I say stuck because I am in no way an outdoors person, but I want to make my little boy happy so sometimes you just have to make sacrifices ;). Well after his last party I had made up my mind, no more parties. After all the time and money spent, just to have people cancel last minute, I told my self for his next birthday all of that money and energy will go into something we can so as a family and something he can really enjoy. So I set out to find the perfect place for our camping expedition. I found a local state park where we could camp right by the lake. I even took a drive there to check out the spot and it was perfect. But I should have known something would go wrong. The weather was calling for over night rain. The last thing I would want is to be out in a tent in the woods with 2 little kids getting rained on, and not to mention the bugs it would bring out!! EEEK No thanks. I love you Adrian but our back yard for a couple of hours sounded just fine to me :) So I had four days and a back yard camp out to plan. I didn't want to be in over my head so after searching online for some ideas and inspiration I decided on just creating a s'mores bar the boys would enjoy. And the search began! Lately I have been challenging my self to re use items from home or previous parties to show that something amazing can be created by keeping the costs low, and this was definitely the case with this set up.


First on the agenda was the s'mores banner. For Dominick's Cookies and Milk party I had a  custom banner which I ordered from Etsy, and I had been wondering what I would do with it after his party. Well I decided to take it apart and use the letter blocks, flipped over, on this banner. I also had a burlap runner from his party and I knew it would work great as a banner. After I cut out the banner shapes I wanted, I glued the paper squares to each one and created each letter using twigs. I have had a pack of left over bandanas from Adrians last birthday party and I knew they would come in handy for this camping theme so I cut out some strips and used them to adorn the banner. So the banner cost me, zero!


After I finished the first banner, I set out on the next one. Camp Adrian! For this one I used the second runner I had left over from Dominick's party. I got some brown construction paper which I cut out and glued onto the burlap runner, and once again used twigs for the letters. For the little teepee design I used smaller twigs and some fabric from old t-shirts. So for this banner the only thing I purchased was the construction paper used which cost me a dollar!


After the banners were all done, I set out on a quest at my favorite place, well besides Dollar Tree, my local antique shop! There I found the green fabric that I used on the table for $1.60.


  I also came across the set of wooden bowls that I used for the toppings and those cost me $6.00 for the set of 4 and the pine cone candle which was only $1! ( and I can re-use it for the holidays, it smells divine)


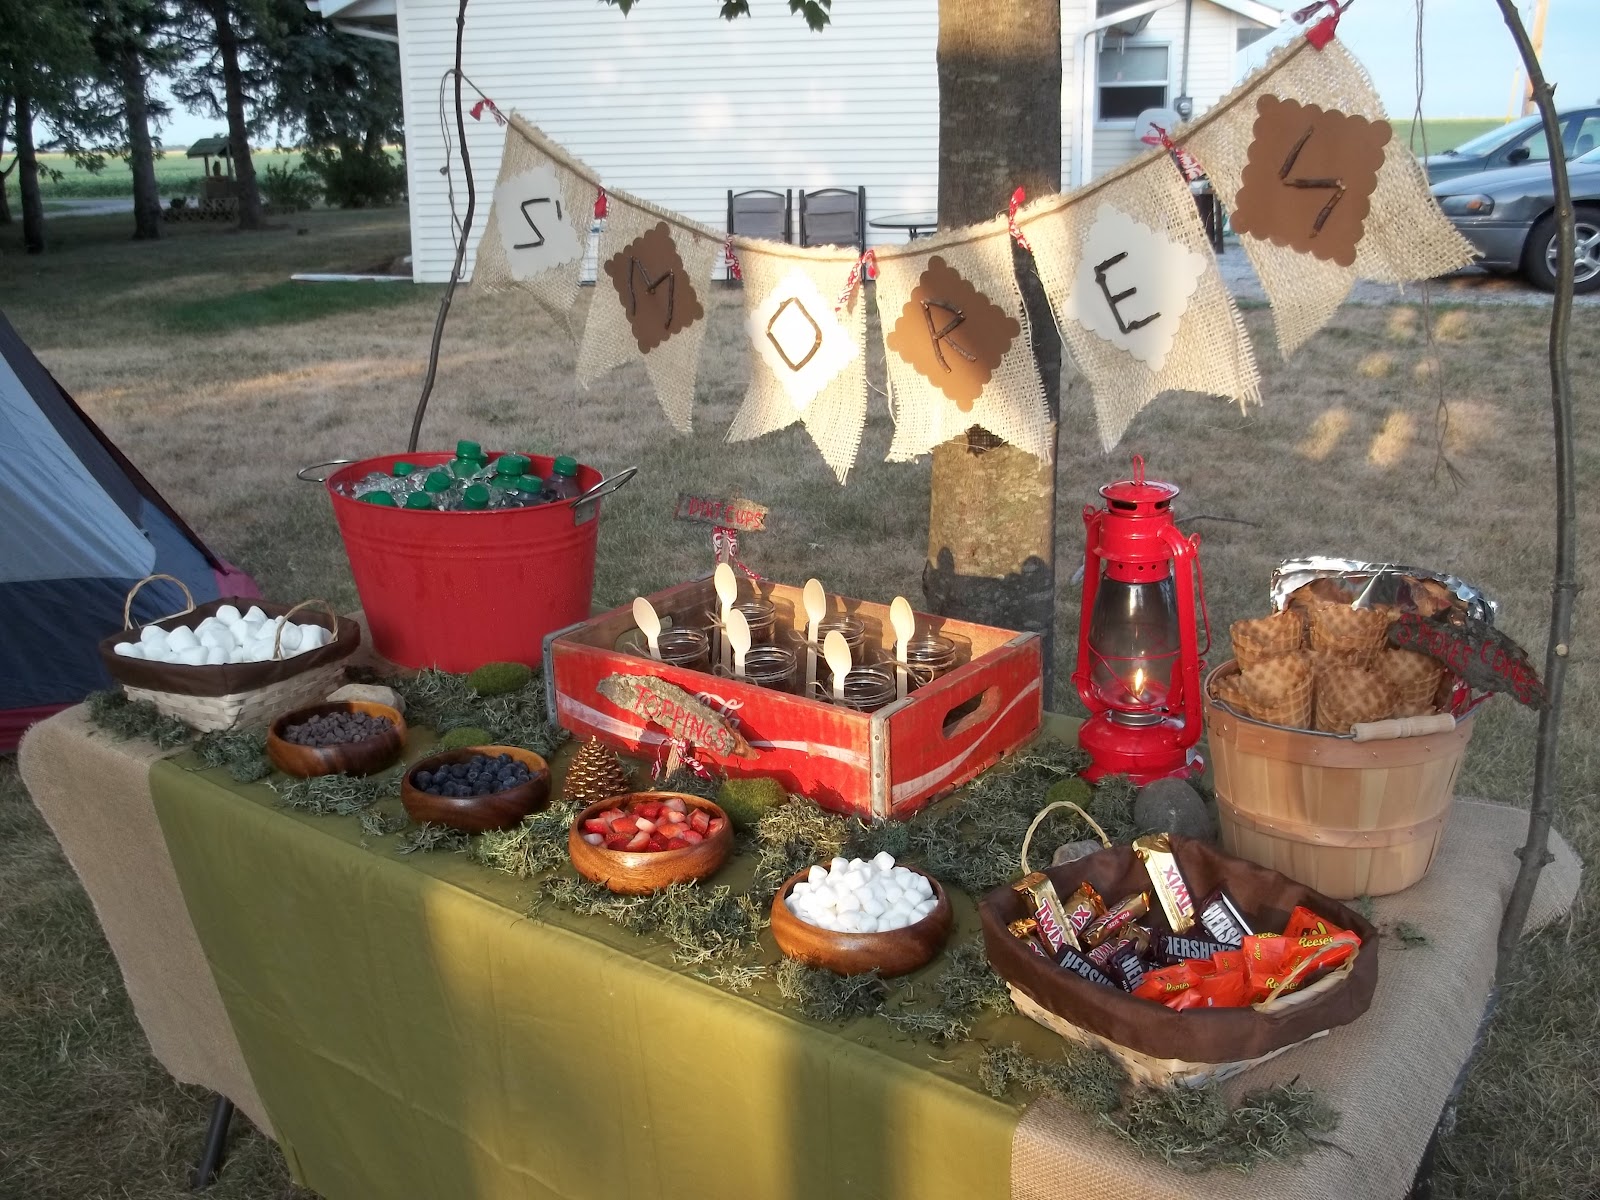
Next stop, of course, was Dollar Tree! Where I found the small baskets with brown fabric and they worked out perfect for the actual s'mores ingredients. I also got a couple of bags of moss to spread around the table to give it that outdoors feel.


My husband came across this old Coca Cola wooden crate a couple of years ago and when I saw it tucked away in out garage I knew it would match my color scheme and be perfect to hold the cupcakes in a jar I had been planning on making. The cute wooden spoons came from Sweet Party Shop. Oh and of course the signs for the food came from my back yard :) tree bark and wood chips with a little touch of bandana and a lot of help from my glue gun!


I found this great idea on Pinterest for camp fire cones and I decided to try it out! The kids werent that much into them, but I loved the gooey chocolaty goodness. 


I loved the way these wooden bowls looked!

 
Camp Adrian!


I got these mason jars for Adrians last birthday and I used them in this party to hang from the tree by the s'mores bar.

They looked amazing all lit up at night.


 My little camper!


The birthday boy and his cousin enjoying their hot dogs in their tent. 


So after 4 days of burning my fingers with my glue gun, this is what I came up with and it all cost me just under $50 dollars. My husband is loving my thrifty party ideas, and so is his wallet :)


Thursday, May 17, 2012

Western Cowboy Party


So since I just started this blog I want to be able to share some of the previous parties I have planned for my boys. This was Adrian's 3rd birthday party and since he is pretty much obsessed with Woody from Toy Story it was a given that he would go for the cowboy party. So I started with the invitations and of course searching on Etsy I found the most adorable invites!


Sammie from Treasures from the 80's is so talented and does an awesome job with invitations. I got so many compliments on these.

For the dessert table I used a lot of baskets to give it a country feel. The cute cookies were made by Danielle from Two Little Cookies and let me tell you she can make ANYTHING! I wish I had that talent! So that brings me to the treats I made. This was my first time making whoopie pies and they would stick to everything, I think the cakes were too warm but they were still delish. I also made some smores pops and cupcakes. The cupcake toppers are from Corner Stop and matched my invitations perfectly. For the hay stacks which I bought at Michaels I glued some gingham ribbon and sheriff's badges to match the theme. Oh and I also bought lots of bandanas from Oriental Trading which I used almost everywhere :)


I found the cow print cups and balloons at Oriental Trading and the paper straws at Dime Store Buddy. I printed out some straw pennants for the kids with their names so they could keep track of their little cups. For the centerpieces, get this, I purchased citronella candles in red buckets. I thought it would be perfect to hold the little skewers and it worked great! I printed out some graphics I found online and with some tissue paper and paper shreds Voila! I had a neat centerpiece. Oh and I also glued a strip of bandana around the bucket with a sheriff badge in the middle, but it was so windy the bandana on the table is covering it on the picture :(


The kids all got cowboy hats and bandanas when they walked into the party. They also had a "trading post" where they would trade gold for their goody bags. They were supposed to play a game of panning for gold but the rain kept us from it :( So I all my time spent spray painting pebbles gold was wasted! But it was still great to see their excitement when they opened their bags. I found lots of goodies at Dollar General, horses, cap guns with badges, tattoos, cowboy themes color pads and of course they got candy from the pinata. And let me just tell you when I found these cow print and paisley print bags at Michaels I almost screamed out loud. I felt like I won the lottery.


For the food and drinks we kept it simple and within the theme serving root beer, lemonade, bbq chicken, potato salad, corn on the cob, and corn bread.We also served the adults drinks in mason jars and their food in pie tins to keep with the country feel. The barn shutter backround is also from Oriental Trading, I found great things there.

Adults Tables


You can see the panning for gold activity in the back but shortly after the party started it began to rain so we had to make a run for it!


Oh and I forgot to mention I made the cake! Which we had inside where we were nice and dry.

My baby cowboy!


The birthday boy in his shirt made by our friends over at Bela Lili
He loved his birthday and keeps asking for another cowboy party!

Wednesday, May 16, 2012

Cookies and Milk 1st Birthday


So Dominick's first birthday was approaching and I knew I had to plan something, after all it is his FIRST birthday! Well with us being away from all our friends and family, it would have to be something small because to be honest we would have no one to invite but my mother in law, my nephew and her husband. So I decided I would just focus on a dessert table. What better dessert for a one year old than cookies and milk! Our new house came with the cutest setting for this party. In our yard is an old wagon, so instead of getting rid of it the previous home owners built a western style shed to match it. I knew I could use these to my advantage so I wanted the party to have a vintage country feel to it. So I set out on my quest for cute things to match the theme. I started out on Etsy like I always do :) and I found the most adorable birthday banner ever!
 Corrie from Toadally Cute Parties did an awesome job. It matched the theme perfectly.

 I also found these adorable cupcake toppers from Paper Party Parade


I hit the jack pot at my local antique shop. I found some old fashioned milk bottles and an old burlap sack that I cut open and in half to use as table runners. For the kids milk bottles I went with, of course, Starbucks Frappuccino bottles. (Let me just tell you when I found that trick out online I almost died.) The paper straws are from Hey YoYo.

 
I kept it simple for favors and just offered good old brown paper bags for my in-laws to take cookies home. I also saved by displaying the cookies in storage jars I already had in my kitchen.


I knew I wanted to display a lot of photos to show Dominick's growth and share the memories through his first year of life. I had this string and clothespin saved from his baby sprinkle and put it to good use with some photos I had printed in lack and white. They looked great on the old wagon.


On the cake table I used a wall shelf I had in storage and placed it on some candle holders for a little height over the cake as the back drop. I got the idea for the pictures in a jar from a party posted by Taffie Wishes on Catch my Party. It was such a unique way to display the photos. All the frames I used for the party were purchased at Dollar Tree, which I spray painted white and sanded just a little to give them a more rustic look. The cake and cupcakes were all adorned with Cookie Crisp cereal and buttercream, and the trays for the cupcake are also from Dollar Tree. Can't beat that!


This was my first attempt at a cake bunting and I'm proud to say it was a success! With a quick tutorial I found on A Pair of Pears it was easier than I thought. 


The old wagon and the shed, my inspiration for it all. In the end I spent about $70 dollars to bring it all together. Talk about party on a budget! That's the reason why I started this blog. To show others that with enough creativity a nice party can be put together on a small budget. Even thought Dominick slept through most of his party, in the end we all enjoyed it and the kids loved it!


Sugar high = Party success!